
How to Install Cameras on a Panasonic Infotainment System
The first step to installing cameras on your Panasonic Infotainment system is making sure you have all of the correct gear. Next is to turn the engine off and disconnect the battery. Whether your truck came with an Infotainment system factory installed, or you upgraded from a NavPlus HD, SmartNav 2.0, or just a plain stereo - that big step is out of the way.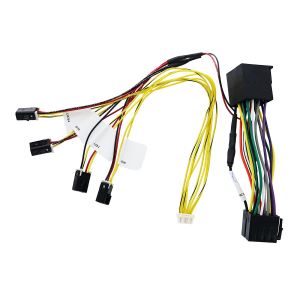
You can connect up to four cameras to the infotainment system using a single adapter. The maximum number of cameras supported is also four.
Which Cameras Can I Use?
While you may be able to adapt some other brand or model of camera to work with the infotainment system, we recommend you use one of these cameras which were designed for your new Panasonic system. You have a couple of options as it relates to picture quality. You can go with standard CVBS, or the new 720P HD version. All compatible cameras are listed here and all of these cameras work with the above mentioned input adapter. Keep in mind that you do not want to mix HD and CVBS cameras. You must use all of one type; HD or CVBS.
Compatible CVBS Cameras
Compatible 720P HD Cameras
Making The Connections
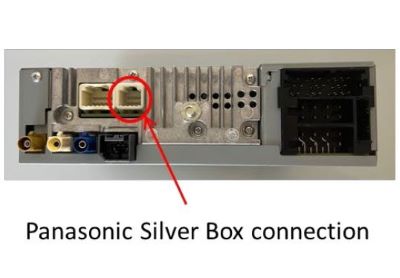
The white wire connector from the PP207341 adapter plugs in to this location. You will disconnect the main 16-way truck wiring connector (ISO-DIN) from the back of the stereo at the lower right-hand corner. This is where the male ISO-DIN end of the PP207341 adapter will plug in. You will then plug the 16-way truck wiring connector into the female ISO-DIN connector on the opposite end of the PP207341 adapter.
At this time you can connect all of your camera cables to their designated inputs on the PP207341 adapter. These are the four small black connectors which are labeled front, rear, left and right. Once complete you can re-install the stereo and the screen back into the dash of your Peterbilt or Kenwroth. Once everything is secure, that battery can be safely reconnected.
Getting to the Advanced Menu
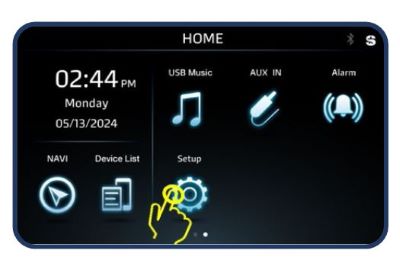
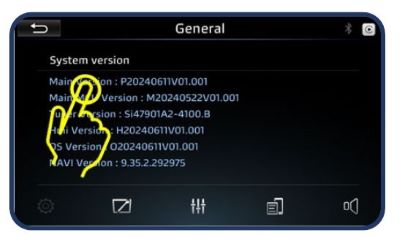
This will bring up the Advanced Menu system.
Activating The Cameras
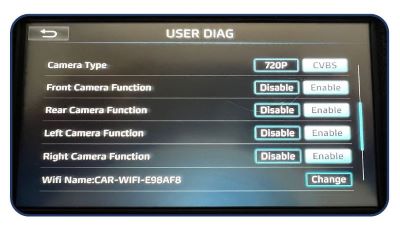
Once you've completed this step, selecting the return arrow on the top left corner will save the changes and also reboot the entire system.
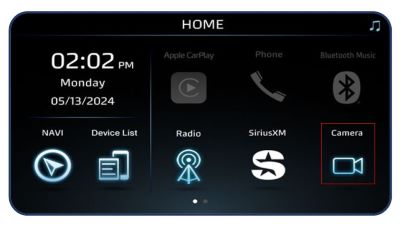
The next step is to locate and tap the camera icon which will bring up a split screen of camera views.
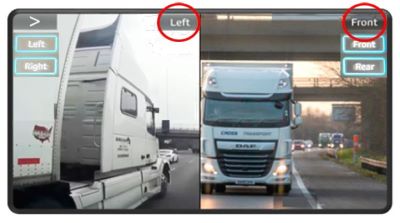
To bring up a different view simply tap the ">" symbol and select any highlighted camera in the top left corner.
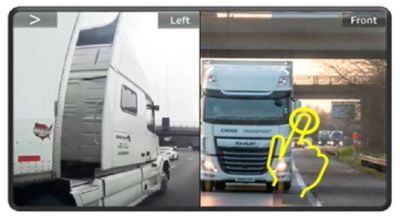
At this point your camera or cameras should be installed and activated and you're ready to hit the road.
If you don't already have the new Panasonic Infotainment system but you're considering the upgrade for your Pete or K-Dub, please checkout our info page on the New Panasonic System for Kenworth and Peterbilt.